A traditional crown bread (couronne) uses a different method for shaping. Gluten free dough, without further enhancements, is not strong or elastic enough to manipulate in that manner. You can however with a bit of creativity make and shape a believable end product. Read on, get inspired, make your own crown or wreath shaped bread!

Ingredients
¼ cup almond flour
1 cup brown rice flour
½ cup potato starch
¼ cup tapioca starch
½ tsp xanthan gum
1½ tsp instant yeast
2½ tsp baking powder
1 tsp brown sugar
¼ tsp salt (see notes)
2 tsp nutritional yeast flakes (optional)
½ tbsp olive oil
½ - ¾ cup warm water (105-115°F)
1 tsp vinegar
3–5 cloves of garlic minced
¼ cup of sliced olives (see notes)
tapioca starch for shaping the dough
Notes
You can sub the flour, starches and xanthan gum with an equivalent amount of a GF bread flour mix i.e. 2 cups
The brine in which the olives are soaking is often salty. If it isn't, you can add an extra pinch of salt. If you are in doubt use only the ¼ tsp suggested in the recipe
If you are using olives from a jar and the brine contains oil, omit the oil from this recipe.
Directions
Place all of the dry ingredients in a bowl, mix well
Make a well in the center of the dry ingredients and add the wet ingredients, start with ½ cup of water. Leave out the olives and the garlic. Knead or mix the ingredients until thoroughly combined. Add more water, very little at a time, if needed. Saturate the dough just enough so it is soft but not as wet as regular gluten free bread dough since the olives will add moisture when it is added later
Cover the bowl with cling wrap or other and set aside in a cool place to rest for about an hour. This step is optional, I have found that resting the dough improves the texture of the finished loaf. Allowing the dough to slow rise overnight in the refrigerator is also an option. Most artisan bakers agree that slow fermentation produces a more developed flavor
Prepare a round baking tin 7” or 8” in diameter. A smaller baking tin means larger buns and a smaller crown.
Prepare a floured surface to shape the dough. You will also need a round oven safe dish to create the shape in the center of the crown. I used a ramekin wrapped in parchment paper
Separate the equivalent of about ½ cup of dough, set aside, keep covered
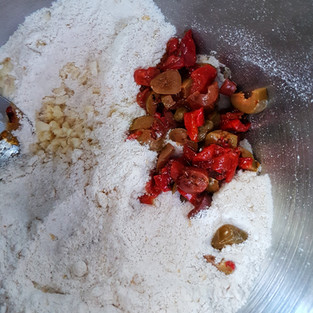
To the rest of the dough add the olives and garlic. Mix well to distribute the olives and garlic evenly throughout. The dough should be a bit sticky but fairly easy to handle. More moisture will give the bread a better crumb, too much will make it difficult to shape and to maintain the shape. Add only as much water as you are comfortable with, at least until the dough feels sticky to the touch
Divide the dough into 7 pieces. Shape the pieces into smooth round balls. Place the dough rounds into the baking tin and around the dish in the center, spacing them as easily as possible. Cover with lightly greased cling wrap and set aside. Working with lightly oiled or flour dusted hands helps
This is where you can get creative in terms of finishing your crown design. This is what I did, you can modify at will
Pinch off pieces of the dough you set aside, 7 pieces about ½ tablespoon each. Roll each piece into a ball. Place the rounds in between the buns, connecting the buns to complete the ring. The rounds are not meant to fill the length of the gaps completely. Use water as the glue to stick the pieces in place
Roll the remainder of the dough into a circle,1/4” thick or less. Cutout a dounut shape that is large enough to form a ring to clear the dish in the center and to partially cover the crown shape. This is meant to further bind the crown and keep it together as one piece. Again, for this and the step that follows, use water as the glue to stick the piece(s) in place
Finally with the remaining scraps cut out small squares (about 1¼”). Turn the squares on the diagonal in a diamond shape, placing them in the gap between each round. Pinch the top of each diamond backward to create the “spikes” on the crown
The important thing here is to find creative ways to connect the buns, forming the crown shape. You can decide what works best for you
Cover with oiled plastic wrap and allow the dough to rise for an hour or more
Toward the end of the rise preheat oven to 350°F. Add a dish or tray of boiling water at the same time you are placing the bread in the oven. You can further spritz the interior of the oven with water just before you close the oven door. In whatever way you can try to create steam which will produce a crackly crust
Lightly dust the “outer rim” of the crown with flour (like brown rice or cornmeal flour). When the oven is ready, bake the crown for 25 minutes. The finished buns will be golden in colour and sound hollow when tapped
Place the crown onto a rack and allow to cool. Brush the inner rim with a little oil. Serve when ready. If you are making ahead, cool the bread, wrap it tightly and store in the freezer


Comments